10 Essential Survival Skills Everyone Should Master
Last Updated: March 2025
The wilderness doesn’t offer second chances. Whether you’re an avid backpacker or simply want to be prepared for unexpected situations, mastering these 10 Essential Survival Skills provides both practical capability and profound peace of mind. I’ve compiled these ten essential skills through years of outdoor experience and training — they’re the foundation of self-reliance in challenging situations.
In addition to this article, I strongly recommend picking up a survival guide and keeping it with your hiking, camping or bug-out gear. I have a copy of The Ultimate Survival Guide by John ‘Lofty’ Wisemanin each of my main load-out packs in addition to one in the glove compartment of each of my family’s vehicles. The paperback version is usually around $9 on Amazon or at a bookstore near you.
Disclaimer
This article is intended as an introductory guide to essential survival skills and
should not be considered a substitute for professional instruction.
While I provide an overview of crucial techniques and knowledge, mastering these skills often requires hands-on learning and guidance from experienced professionals. I strongly recommend seeking formal training and courses to develop and refine your survival abilities. Always prioritize safety and seek expert advice when venturing into complex or hazardous situations.
- 10 Essential Survival Skills Everyone Should Master
- 1. Finding and Purifying Water
- 2. Building an Effective Shelter
- 3. Starting and Maintaining Fire
- 4. Finding and Preparing Food
- 5. Navigation Without Technology
- 6. First Aid and Self-Care
- 7. Effective Signaling Techniques
- 8. Knot Tying Essentials
- 9. Mental Resilience
- 10. Environmental Awareness
- Building Your Personal Preparedness

1. Finding and Purifying Water
Water dictates survival more than any other factor. You might survive weeks without food, but only days without water.
Locating Natural Water Sources
In wooded terrain, follow vegetation to locate low-lying areas where water naturally collects. Morning dew captured on clean cloth can provide emergency hydration in otherwise dry environments. Animal tracks often lead to water sources, and clusters of green vegetation amid dry surroundings typically indicate underground springs. See also: Tips for Camping in the Rain.
When natural sources aren’t visible, a solar still can extract moisture from seemingly barren ground:
- Dig a pit roughly three feet in diameter and two feet deep
- Place a container at the bottom center
- Cover the pit with clear plastic, secured with rocks around the edges
- Place a small stone in the center above your container to create a drip point
- Condensation will collect and drip into your container
Reliable Water Purification Methods
Never assume naturally occurring water is safe to drink. Clear mountain streams can harbor microscopic threats just as effectively as stagnant pools.
Boiling: The most reliable purification method. Bring water to a rolling boil for at least one minute (three minutes at elevations above 6,500 feet). This kills virtually all pathogens but doesn’t remove chemical contaminants.
Filtration: Modern portable filters remove bacteria and protozoa. Quality filters use ceramic, carbon, or hollow fiber technology with pore sizes of 0.2 microns or smaller. However, most filters don’t eliminate viruses, which are typically only a concern in developing regions.
Chemical Treatment: Iodine and chlorine tablets work by killing microorganisms. They’re lightweight and reliable but impart a chemical taste. Neutralizing tablets can improve flavor after treatment is complete. Note that Cryptosporidium is resistant to chemical treatment alone.
UV Purification: Handheld UV devices like SteriPEN disrupt the DNA of harmful microorganisms. These are effective but depend on batteries and clear water to function properly.
2. Building an Effective Shelter
Exposure kills far more people in wilderness emergencies than any other factor. Understanding shelter construction principles is crucial whether you’re caught in unexpected weather or dealing with a longer-term survival situation.
Selecting the Optimal Location
Before gathering a single branch, assess your surroundings:
- Choose flat, dry ground above potential water runoff paths
- Find an area with plenty of options for staying cool in summer environments
- Avoid depressions where cold air settles overnight
- Check overhead for dead branches or “widow-makers” that could fall
- Consider natural windbreaks like rock formations or dense brush
- Stay within reasonable distance of water sources but not in flood-prone areas
- In winter, avoid avalanche-prone slopes entirely
Your shelter’s location can be as important as its construction for maintaining body temperature and safety.
Natural Material Shelters
The environment provides everything needed for emergency shelter. These three designs use minimal tools and adapt to most environments:
Lean-to: Simple and quick to construct. Find a fallen tree or horizontal branch around 4 feet high. Lean smaller branches against it at 45-degree angles, then layer vegetation from bottom to top like roof shingles. This creates a waterproof barrier against rain or snow.
Debris Hut: Superior insulation for cold conditions. Create a framework resembling a narrow tent with a ridgepole and ribbing sticks. Cover with layers of leaves, pine needles or other vegetation at least 2-3 feet thick. A small entrance should be the only opening.
Snow Cave: In winter conditions, packed snow provides excellent insulation. Tunneling into a snowdrift creates a shelter where body heat can raise interior temperatures significantly above outside conditions. Always include ventilation holes to prevent carbon dioxide buildup.
Enhancing with Modern Materials
A few compact items dramatically improve shelter effectiveness:
- Emergency space blankets reflect up to 90% of body heat and serve as waterproof tarps
- Paracord (50-100 feet) enables countless construction possibilities
- A compact survival tarp creates instant waterproof coverage
When integrating these materials with natural resources, even minimal supplies can produce remarkably effective protection from the elements.
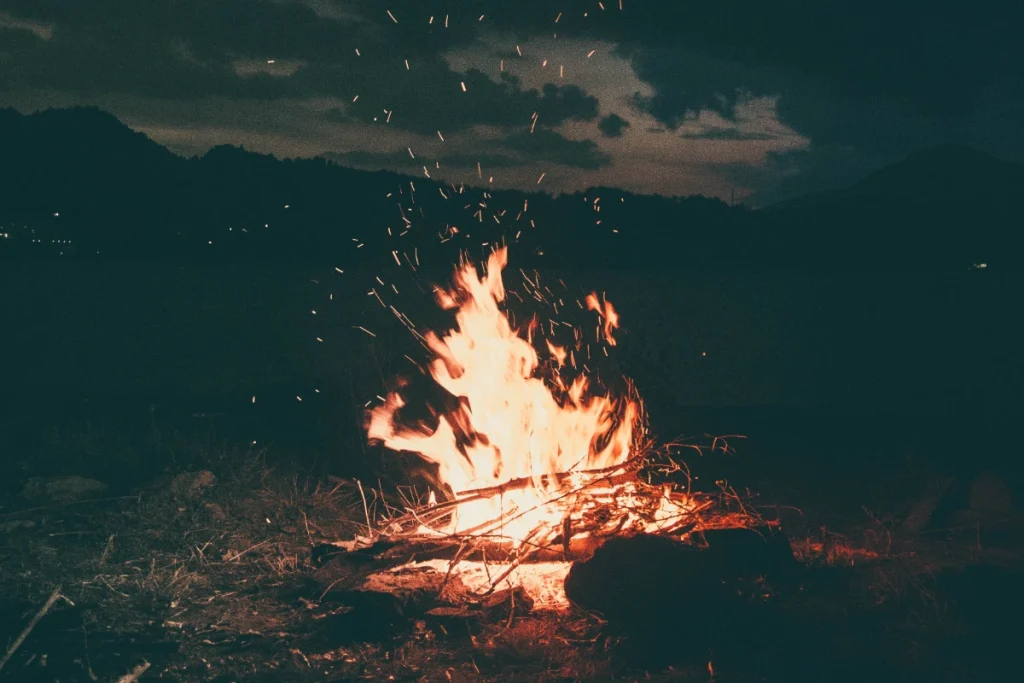
3. Starting and Maintaining Fire
Fire transforms a survival situation by providing warmth, light, water purification, food preparation, signaling capability, and psychological comfort. Mastering multiple fire-starting methods ensures you’re never without this critical resource.
Understanding the Fire Triangle
Every successful fire requires three elements: heat (ignition source), fuel, and oxygen. Remove any one, and the fire fails. This principle governs both starting and controlling fire.
Preparing an Effective Fire Lay
Proper preparation dramatically increases success rates, especially in challenging conditions:
- Tinder: Materials that ignite from a spark or match. Natural options include birch bark, dry grass, certain fungi, and cedar shavings. Cotton balls soaked in petroleum jelly make exceptional prepared tinder.
- Kindling: Pencil-thickness sticks that catch fire from tinder and produce enough heat to ignite larger fuel. Dead, standing branches typically provide the driest kindling.
- Fuel wood: Progressively larger material that sustains the fire. Wrist-thick pieces burn longer; hardwoods like oak and maple produce more consistent heat than softwoods.
Arrange these materials in one of these proven configurations:
- Teepee fire: Tinder in center with kindling leaned around it like a cone. Allows excellent airflow but requires more attention.
- Log cabin fire: Stack kindling in alternating layers like building blocks. More stable in wind, burns more evenly.
- Dakota fire hole: Dig two holes connected by an underground tunnel. Fire burns in one hole while air flows through the other, creating efficient, low-profile heat with minimal smoke.
Multiple Ignition Methods
Never rely on a single fire-starting technique. Master these approaches in order of reliability:
- Ferrocerium rod (firesteel): Produces 3,000°F sparks regardless of weather conditions, works when wet, and lasts for thousands of strikes. Requires proper technique — scrape the striker down the rod forcefully while aiming sparks directly into prepared tinder.
- Lighters: Convenient but vulnerable to moisture and fuel depletion. Zippo-style lighters perform better in wind but evaporate quickly if not sealed.
- Matches: Storm-proof matches burn even when wet but come in limited supply. Standard matches require waterproof storage.
- Friction-based methods: Bow drill, hand drill, and fire plow techniques use friction to generate ember. These require significant practice under ideal conditions before attempting in actual survival situations.
- Optical methods: Focused sunlight through magnifying lenses, eyeglasses, or even water-filled clear plastic can ignite tinder but obviously requires direct sunlight.
Maintaining and Using Fire Effectively
Once established, manage your fire according to your needs:
- For warmth, build a reflector wall using rocks or logs behind the fire to direct heat toward your shelter
- For cooking, allow wood to burn down to coals rather than cooking over active flames
- For overnight warmth, hardwoods or thick logs will provide sustained heat
- Never leave fire unattended, and extinguish completely by drowning with water and stirring until all material is cool to touch
4. Finding and Preparing Food
While less immediately critical than shelter or water, food becomes increasingly important in extended survival situations. Understanding how to procure nutrition from your environment prevents weakness, improves morale, and extends survival timeframes.
Edible Plant Identification
Plants provide the most readily accessible wilderness food source but require absolute certainty in identification (See also: Morel Mushrooms Near You). Follow this process:
- Learn 5-10 easily identifiable edible plants for your region before any wilderness excursion
- Focus on plants with no toxic look-alikes (dandelion, cattail, pine, oak)
- Apply the Universal Edibility Test for unknown plants only in genuine emergencies:
- Separate the plant into components (leaves, stems, roots)
- Rub a small portion on your skin and wait 8 hours for reactions
- Touch to lips and wait 3 hours
- Place tiny amount on tongue without swallowing, wait 8 hours
- Swallow small portion and wait 8 hours
- If no adverse reactions occur, the plant part may be safely consumed in small quantities
Common edible wild plants across North America include:
- Dandelion (entirely edible)
- Cattail (roots and shoots)
- Amaranth (leaves and seeds)
- Chickweed (stems and leaves)
- Clovers (flowers and leaves)
- Pine (inner bark and needles for tea)
While foraging is valuable, learning to grow your own food is a sustainable survival skill that provides reliable nutrition in both everyday life and emergency situations.
Basic Hunting and Trapping
Animal protein provides concentrated nutrition but requires more specialized knowledge and equipment:
Passive trapping conserves energy while you attend to other survival needs. Simple snares crafted from cord, wire, or natural fibers can catch small game when placed on active animal trails. Figure-4 deadfall traps use a trigger mechanism to drop a heavy object on prey.
Fishing often provides the best return on energy investment. Improvised hooks can be fashioned from thorns, bone, or appropriate hardware. Gorge hooks (straight double-pointed sticks) work when fish swallow the bait. Multiple-pronged spears are effective in shallow, clear water.
Active hunting requires significant skill and proper tools. In true survival situations, focus on smaller game requiring less energy to obtain. Birds, squirrels, and other small animals present less risk and greater success probability than larger game.
Safe Food Preparation
Proper preparation prevents illness that could worsen your situation:
- Cook all animal foods thoroughly to eliminate parasites and bacteria
- Boil unknown plant foods for at least 10 minutes to reduce potential toxins
- When preserving excess food, smoking or drying helps prevent spoilage
- Use separate preparation areas for plant and animal foods to prevent cross-contamination
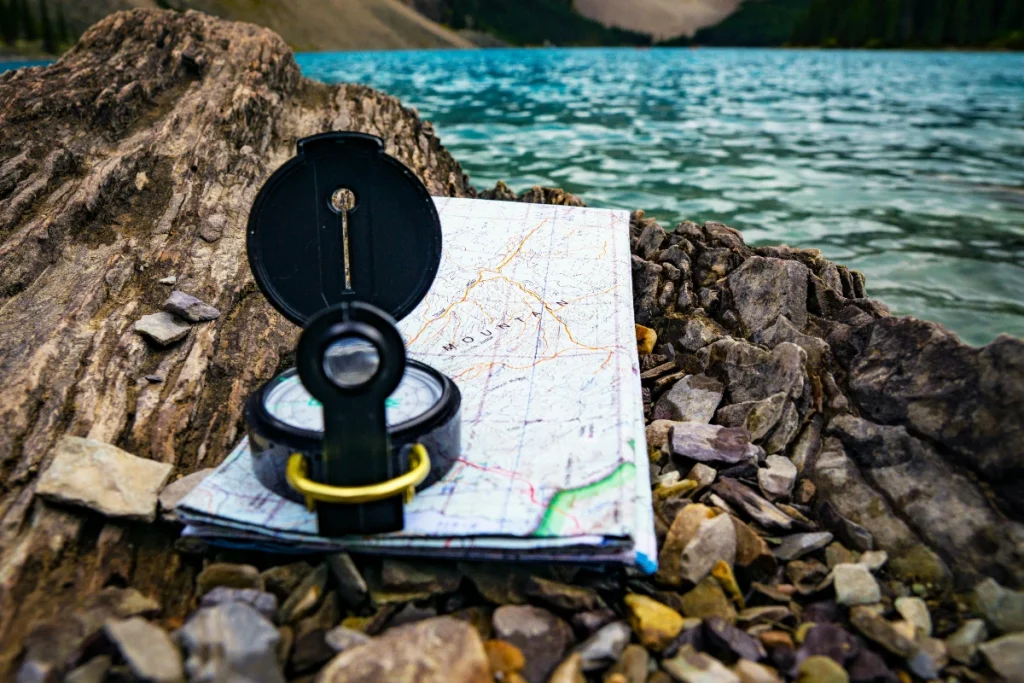
5. Navigation Without Technology
In an age of GPS-enabled devices, traditional navigation skills have diminished. Yet when batteries die or equipment fails, understanding how to determine direction and location becomes critical for finding safety.
Map and Compass Fundamentals
A map and compass remain the most reliable navigation tools when properly used. Master these basic skills:
- Understanding map scales, contour lines, and symbols
- Taking and following a bearing with a compass
- Triangulating your position using visible landmarks
- Adjusting for magnetic declination based on your location
- Following terrain features that act as natural “handrails”
Keep topographic maps of your destination in waterproof storage as backup to electronic devices.
Natural Navigation Methods
When equipment is unavailable, nature provides directional cues:
Solar navigation: The sun rises in the east and sets in the west. At noon in the Northern Hemisphere, the sun sits in the south (north in Southern Hemisphere). A simple analog watch can act as an improvised compass—point the hour hand at the sun, and halfway between the hour hand and 12 o’clock points south (Northern Hemisphere).
Star navigation: The North Star (Polaris) remains almost directly above the North Pole, providing a reliable indicator of north in the Northern Hemisphere. Locate it by following the pointer stars in the Big Dipper’s cup.
Natural indicators: While less reliable than celestial methods, some natural features offer directional hints:
- In the Northern Hemisphere, moss often grows more abundantly on the north side of trees and rocks
- Growth rings on stumps may be wider on the south side of trees in open areas
- Spider webs frequently appear on the south or southeast sides of trees
Landmark Recognition and Route Finding
Moving through wilderness effectively requires:
- Identifying prominent features and using them as reference points
- Recognizing easily followed terrain features like ridgelines, streams, or game trails
- Understanding how to safely navigate obstacles like dense vegetation or steep terrain
- Reading the landscape ahead to choose efficient routes that conserve energy
Remember that traveling downhill and downstream typically leads to civilization, though this isn’t universal and may sometimes lead to dangerous terrain.
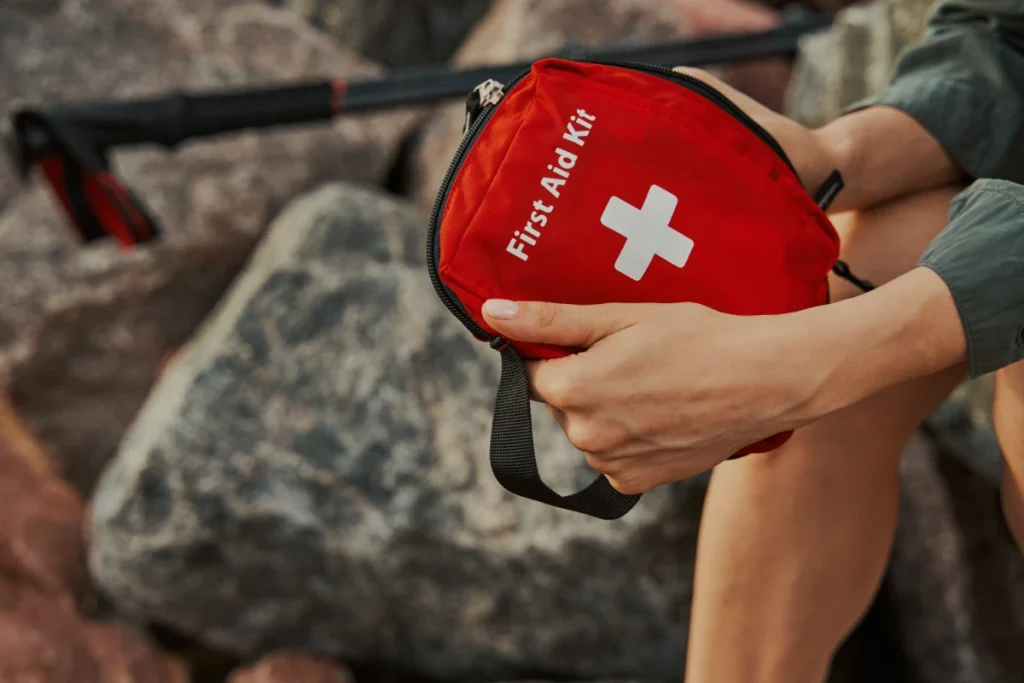
6. First Aid and Self-Care
Medical emergencies become magnified when professional help isn’t readily available. Proper first aid knowledge extends survival timeframes and prevents minor issues from becoming life-threatening.
Treating Common Wilderness Injuries
Bleeding: Apply direct pressure to wounds using clean cloth. For severe bleeding, maintain pressure for at least 15 minutes without checking. Improvised tourniquets should be used only for life-threatening extremity bleeding when direct pressure fails.
Burns: Cool with clean water for at least 10 minutes, cover with clean, dry bandage. Never apply creams, butter or other substances to serious burns.
Fractures: Immobilize the injury site including joints above and below the break. Improvised splints from rigid materials (sticks, trekking poles) secured with cloth, belts or cordage stabilize the injury until professional treatment.
Sprains: Follow RICE protocol (Rest, Ice/cold, Compression, Elevation). Cold water soaks can substitute for ice. Improvise compression wraps from clothing torn into strips.
Hypothermia: Recognized by the “umbles” (mumbles, stumbles, fumbles, grumbles). Remove wet clothing, gradually warm the core first (not extremities), and prevent further heat loss using available insulating materials and shelter.
Heat illnesses: Move to shade, cool with water, and hydrate with electrolytes if available. Heat exhaustion progresses to life-threatening heat stroke when sweating stops and mental confusion increases.
Preventing Medical Emergencies
Proactive practices prevent many wilderness emergencies:
- Maintain proper hydration regardless of activity level or weather
- Inspect feet daily when hiking to address “hot spots” before blisters form
- Practice scrupulous hygiene, especially hand washing before eating
- Regulate body temperature through appropriate clothing layers
- Test questionable water sources before depending on them
- Respect weather conditions rather than fighting against them
Psychological First Aid
Mental state directly impacts survival outcomes. Maintain psychological health by:
- Establishing structured routines regardless of circumstances
- Setting achievable small goals to create ongoing sense of accomplishment
- Practicing positive self-talk instead of catastrophizing
- Conserving energy for essential tasks rather than panic-driven activities
- Making deliberate decisions rather than impulsive reactions
7. Effective Signaling Techniques
Rescue often depends on your ability to draw attention to your location. Understanding and employing effective signaling methods dramatically increases detection probability.
Visual Signaling
Signal fires: Create three fires arranged in a triangle or straight line—the universal distress pattern. Adding green vegetation, rubber, or certain plastics to an established fire creates visible smoke columns. White smoke stands out against dark backgrounds while black smoke contrasts against bright skies.
Signal mirrors: Highly effective up to 10 miles on sunny days. Proper technique involves reflecting sunlight through your extended fingers toward the target, then bringing your fingers down while maintaining the flash on target. Military signal mirrors include aiming instructions, but any reflective surface works with practice.
Ground-to-air signals: Create large symbols visible from aircraft using contrasting materials:
- V = Require assistance
- X = Require medical assistance
- → = Proceeding in this direction
- 🞧 (circle with line through it) = No
Make these symbols at least 10 feet long in open areas using materials that contrast with the surroundings.
Audio Signaling
Sound can alert rescuers to your location even when visual confirmation isn’t possible:
- Three of any sound signal (whistle blasts, shouts, stick strikes on trees) universally indicates distress
- Whistles carry much further than voice and require less energy
- Improvise whistles from hollow plant stems or by blowing across bottle openings if no commercial whistle is available
- Timing signals at regular intervals conserves energy while maintaining alerting effectiveness
Electronic Signaling
When available, modern devices offer significant advantages:
- Personal Locator Beacons (PLBs) transmit your position to satellite networks
- Signal fires positioned to reflect against emergency blankets amplify visibility
- Flashlights used with SOS pattern (three short, three long, three short) indicate distress
- Cell phones may connect even in areas with limited service by texting rather than calling and by trying higher elevations
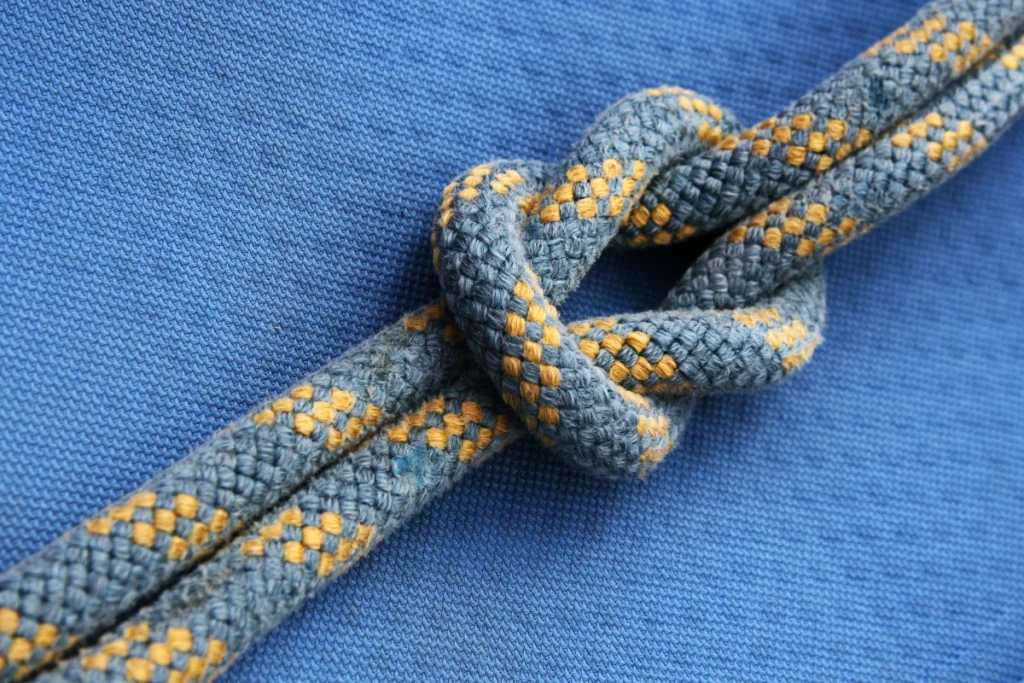
8. Knot Tying Essentials
Secure connections between materials enable shelter building, tool creation, first aid applications, and countless other survival applications. Mastering a few versatile knots proves more valuable than knowing many specialized ones.
Foundational Knots
The Bowline: Creates a fixed loop that won’t slip or tighten under load. Essential for rescue operations, securing shelter corners, or creating tie points that won’t constrict.
- Form a small loop in the standing part of the rope
- Pass the working end up through the loop
- Bring the working end around behind the standing part
- Pass the working end back down through the loop
- Tighten by pulling the working end while holding the loop
The Taut-line Hitch: An adjustable knot that maintains tension. Ideal for guylines on shelters, clotheslines, or any application requiring adjustable tension.
- Wrap the working end around a fixed object
- Pass the working end over the standing part twice
- Bring the working end back over itself and wrap once around the standing part above previous wraps
- Pull tight while sliding to adjust tension
The Sheet Bend: Joins two ropes, especially effective when ropes are of different diameters.
- Form a bight in the thicker rope
- Pass the thinner rope through the bight from below
- Bring the thinner rope around behind the bight
- Tuck the thinner rope under itself
- Tighten by pulling all four strands
The Square (Reef) Knot: Joins ropes of equal diameter or secures bandages in first aid.
- Right over left, left over right
- Remember: this knot isn’t suitable for critical loads
Practical Applications in Survival
Different scenarios call for specific knotting applications:
For shelter construction: Bowline secures corner points while taut-line hitches provide adjustable tension on guylines.
For medical emergencies: Square knots secure bandages without creating pressure points.
For food procurement: Sheet bends connect different materials when creating fishing line or snares.
For rescue operations: Bowlines create secure harnesses or attachment points for moving injured people.
Practice tying these knots in adverse conditions—with cold hands, limited light, or while wearing gloves—to ensure capability when most needed.
9. Mental Resilience
Physical skills alone don’t ensure survival. Mental toughness often determines success in challenging situations. Developing psychological resilience prepares you to face adversity effectively.
Survival Psychology Fundamentals
The survival mindset consists of several critical components:
Positive mental attitude: Arguably the most crucial element in any survival situation. Focus on what you can control rather than what you can’t. Find purpose in small tasks and celebrate minor victories.
Adaptability: Rigid thinking leads to failure when conditions change. Develop multiple options for essential needs like water, shelter, and signaling rather than committing to single approaches.
Stress management: Acute stress triggers helpful physiological responses, but prolonged stress impairs decision-making. Combat this with:
- Controlled breathing (4-count inhale, 4-count hold, 4-count exhale)
- Progressive muscle relaxation
- Task focus rather than outcome focus
- Constructive self-talk
Decision-Making Under Pressure
Clear thinking amid challenging circumstances requires practice:
- Prioritize needs using the Rule of Threes: survival typically requires addressing needs in this order:
- Air (3 minutes)
- Shelter/warmth (3 hours in harsh conditions)
- Water (3 days)
- Food (3 weeks)
- Conserve energy by making deliberate rather than impulsive decisions. The STOP acronym helps:
- Stop
- Think
- Observe
- Plan
- Create structure within chaos by establishing routines. Set regular times for:
- Maintaining and improving shelter
- Collecting and purifying water
- Signaling for rescue
- Rest and self-care
Maintaining Psychological Health
Extended survival situations tax mental health. Counteract this through:
- Maintaining a sense of purpose beyond mere survival
- Establishing control over small aspects of your environment
- Creating mental anchors through routines and future visualization
- Managing fears by breaking challenges into manageable components
- Finding meaning in the experience rather than viewing it solely as hardship
Understanding that discomfort is temporary helps maintain perspective during challenging situations.
10. Environmental Awareness
True survival capability stems from reading and adapting to your environment rather than fighting against it. Developing environmental awareness transforms your surroundings from adversary to ally.
Weather Prediction
Natural indicators often provide advance warning of changing conditions:
- Red sky at morning suggests approaching storms; red sky at night indicates fair weather
- Decreasing air pressure (often accompanied by dropping cloud ceiling) signals incoming precipitation
- Animal behavior changes before weather shifts—birds flying lower and insects becoming more active before storms
- Increasing wind coupled with dropping temperature frequently precedes frontal systems
Recognizing these patterns allows proactive rather than reactive responses to weather changes.
Understanding Local Ecosystem Relationships
Ecosystems function through interconnected relationships. Observing these connections reveals valuable information:
- Certain plant communities indicate water availability and soil conditions
- Animal movements reflect food sources and water accessibility
- Natural cycles (seasonal changes, migrations, flowering patterns) provide predictability amid apparent chaos
This knowledge enables you to locate resources more efficiently and anticipate environmental changes.
Minimizing Environmental Impact
Even in survival situations, responsible practices matter:
- Leave natural shelters intact when possible for future use
- Take only what’s needed from available resources
- Properly extinguish fires and dismantle structures when leaving an area
- Dispose of waste responsibly to prevent contamination of water sources
These practices preserve resources for potential future needs and demonstrate respect for natural systems that support survival.

Building Your Personal Preparedness
Survival skills require both knowledge and practice. Reading alone doesn’t create capability—regular application in controlled settings builds the competence needed during actual emergencies.
Start with these practical steps:
- Assemble appropriate emergency kits and/or Bug Out Bags for your vehicle, home, and when traveling
- Practice fire starting using multiple methods in various weather conditions
- Learn local edible plants through guided instruction from qualified experts
- Take wilderness first aid courses rather than relying solely on written materials
- Test your gear before depending on it in critical situations
- Participate in scenario-based training that incorporates stress and uncertainty
Remember that survival preparation isn’t about expecting disaster—it’s about developing capabilities that provide freedom to explore and confidence to handle unexpected situations.
The journey toward self-reliance is ongoing. Each skill you master builds a foundation for the next, creating a positive spiral of increasing capability and confidence.
This guide provides general information for educational purposes only. Proper training with qualified instructors is recommended before attempting survival techniques in actual emergency situations. Always prioritize safety and good judgment when applying these skills.